

Crafting is an important mechanic of RPGs. This is even more true for Kingdom Come Deliverance 2, where you not only need to gather the necessary material for weapons, but also need to do the crafting yourself. In this guide, we will take you through the method of crafting the best items so you can get that edge in combat.
How To Learn Blacksmithing In Kingdom Come: Deliverance 2
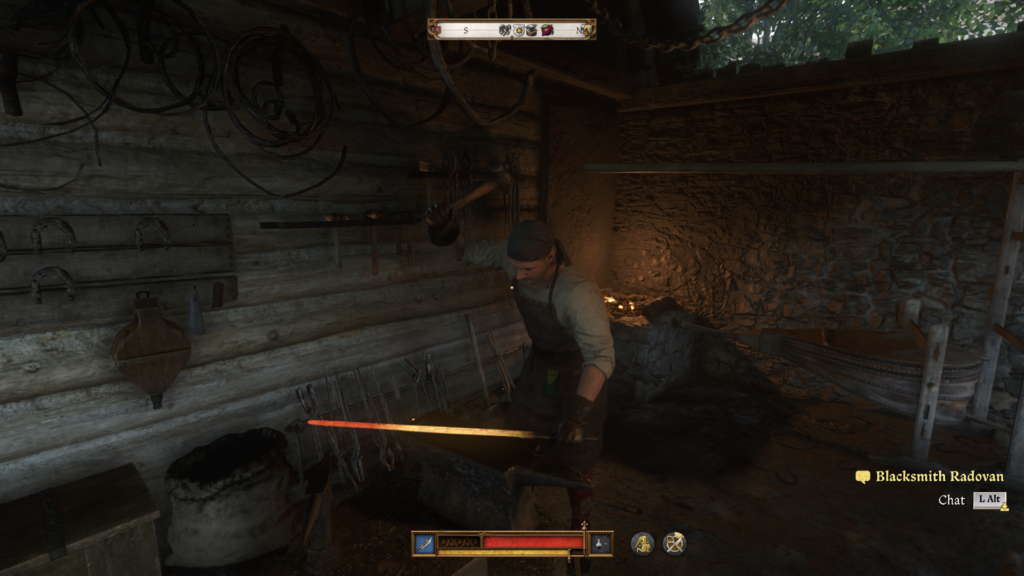
Even though Henry is shown as the child of a renowned blacksmith of Skallitz, he needs to wipe off the dust on his skills. You can learn smithing very early in the game, by choosing to visit Radovan instead of Kreyzl during the “Wedding Crashers” quest. He is located in the Tachov region, just down the the Tavern. Talk to him, and you will be taken through a tutorial on how to smith basic weapons.
How To Smith The Best Weapons In Kingdom Come: Deliverance 2
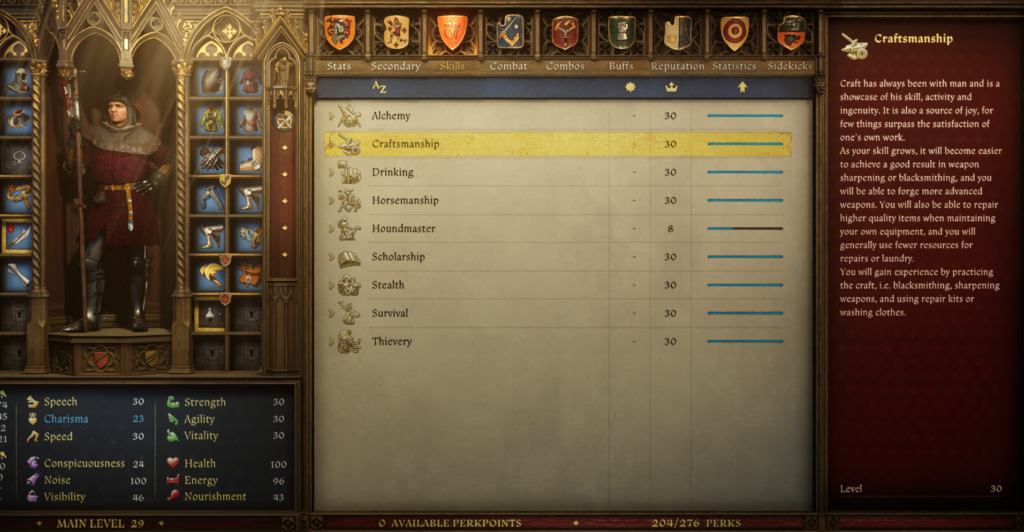
Basic weapons won’t cut it as you progress through the game. You will quickly find that even roadside bandits wield better weapons than you. You need something better, that not only balances the fight but also gives you a better chance. However, you must first level up your Craftsmanship skill. It can be done by frequently crafting your own weapons and other items, and repairing them.
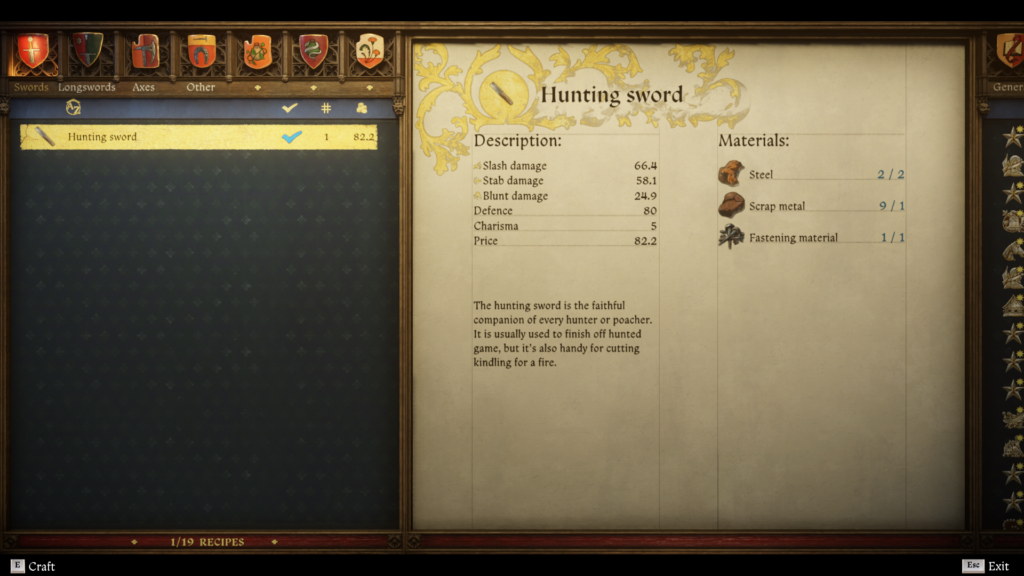
You need the sketches of items you want to craft, which can either be bought from blacksmiths around the world or looted from chests. Next, you need to gather the necessary materials for that particular item. For example, a Hunting Sword requires:
- 2x Steel
- 1x Scrap Metal
- 1x Fastening Material
Now, you need a few perks that will enhance your smithing ability drastically. The perks I got first in the Craftsmanship skill were:
- Hardened Steel: Weapon quality deteriorates 20% slower
- Keen Eye: Getting a smith to repair your weapons provides Craftsmanship experience
- Martin’s Secret: Able forge level 4 quality weapons
If you can, try saving at least one perk point for Martin’s Secret, since level 4 items are extremely strong, arguably the best in the game.
The Best Method To Craft High-Tier Weapons
Even though you have the Martin’s Secret perk, you can still end up with mediocre quality weapons if you botch the process. You need to be careful with it, taking great care in each step.
Step 1: Heating the Iron
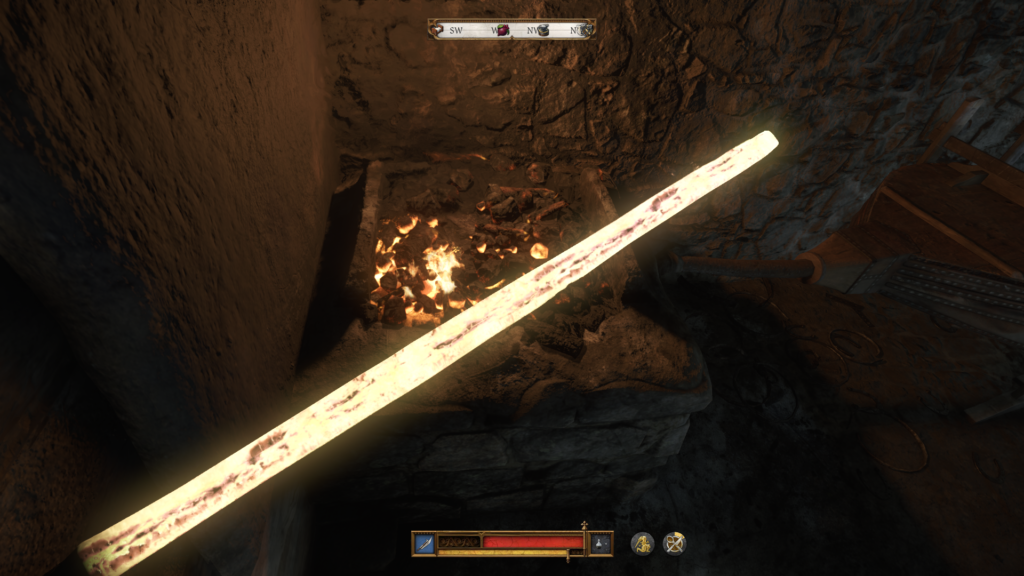
Start normally by putting the iron on the forge. Usually, you would wait for Henry’s audible cue to move it to the anvil. Instead, you must now look for the perfect yellowish-orange glow, then immediately take it to the anvil. If Henry says he’s burning it or simply curses, it means you have made a mistake and you need to start over.
Step 2: Hammering the Weapon
Carefully hammer each part of the item you choose. If you are making a sword, hammer it down from bottom to top, then top to bottom. Turn it and do the same on the other side. The clip above shows only one ’round’, but you must do it twice. You will know are doing it correctly when you see sparks flying out of your item.
Step 3: Quench and Finish
When it is ready, Henry will automatically take the item off the anvil and you will get the prompt to finish it. Additionally, remember that you must not need to heat it up again, since that is also an indicator that you have made a mistake.
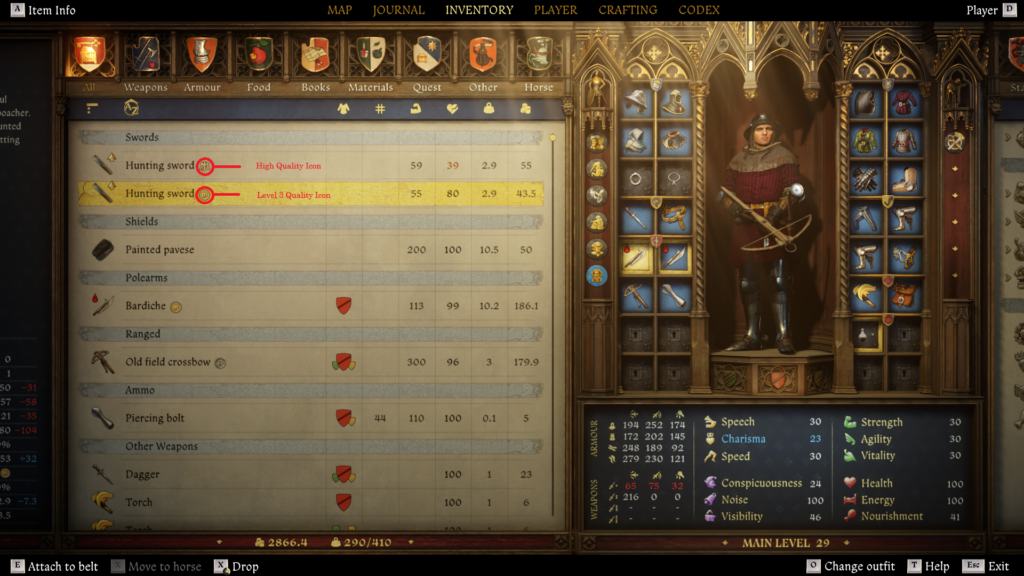
If you have done everything correctly, you will forge a sword that has a different icon than usual. You can check that under the quality tab, or just adjacent to the name of your sword.
Note: There is currently a bug that sometimes doesn’t show the correct tier under the Quality tab, so it is better to open your inventory and check it manually.
To master other important mechanics that the game has, check our guide on Sneaking and stealing in KCD2.